Installation
Requirements
INFOThe Apple Pay In-App Provisioning entitlement (
com.apple.developer.payment-pass-provisioning) only works with distribution provisioning profiles. Therefore, to test the complete end-to-end push provisioning flow, you must distribute your app via TestFlight or the App Store.
Before implementing Apple Pay In-App Provisioning, ensure you meet these prerequisites:
- Signed agreement with Apple.
- Apple Pay In-App Provisioning entitlement assigned to your Team ID by Apple (see Enabling App for Apple Pay In-App Provisioning).
- App Store app Adam ID whitelisted by Apple.
- Device running iOS version 11.0 or higher.
- Active internet connection on the device.
- Note: Apple Pay may not function correctly on jailbroken devices.
Xcode
Xcode is recommended for developing and building the project.
Adding Framework and Configuration to the Xcode Project
-
Download the
mpp-<environment>-<version>.ziparchive using your Nexus Repository credentials:- Test environment:
https://nexus.ext.meawallet.com/repository/mpp-ios-group/ios/mpp-test/<version>/mpp-test-<version>.zip - Production environment:
https://nexus.ext.meawallet.com/repository/mpp-ios-group/ios/mpp-prod/<version>/mpp-prod-<version>.zip
- Test environment:
-
Unzip the downloaded archive, which contains the iOS XCFramework named
MeaPushProvisioning.xcframework. -
In your Xcode project, add
MeaPushProvisioning.xcframeworkunder theFrameworks, Libraries and Embedded Contentsection in your target'sGeneralsettings. SelectEmbed & Sign. -
Download
mea_config.<issuer>.zip. -
Unzip this archive to obtain the configuration file
mea_config. -
Place the
mea_configfile in your iOS app’sResourcesfolder and associate it with your app target. Ensure this file is included in the final app bundle, as the framework automatically loads the configuration at runtime.
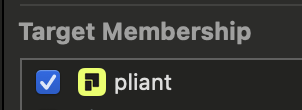
Double-check that mea_config is associated correctly with your app target:
M1 Support
Note: Follow these steps only if you encounter issues related to Apple M1 compatibility.
The MPP SDK supports Apple M1 devices and the latest Xcode version. If you experience build errors related to the arm64 architecture for the iOS Simulator, follow these steps:
- In your Xcode project Build Settings, add
arm64to the Excluded Architectures list for your iOS Simulator target to resolve errors such as:
MppTestApp-iphonesimulator/MeaPushProvisioning.framework/MeaPushProvisioning,
missing required architecture arm64 in file /Library/Developer/Xcode/DerivedData/MppTestApp/Build/Products/MppTestApp-iphonesimulator/MeaPushProvisioning.framework/MeaPushProvisioning (2 slices)
Undefined symbols for architecture arm64
...
ld: symbol(s) not found for architecture arm64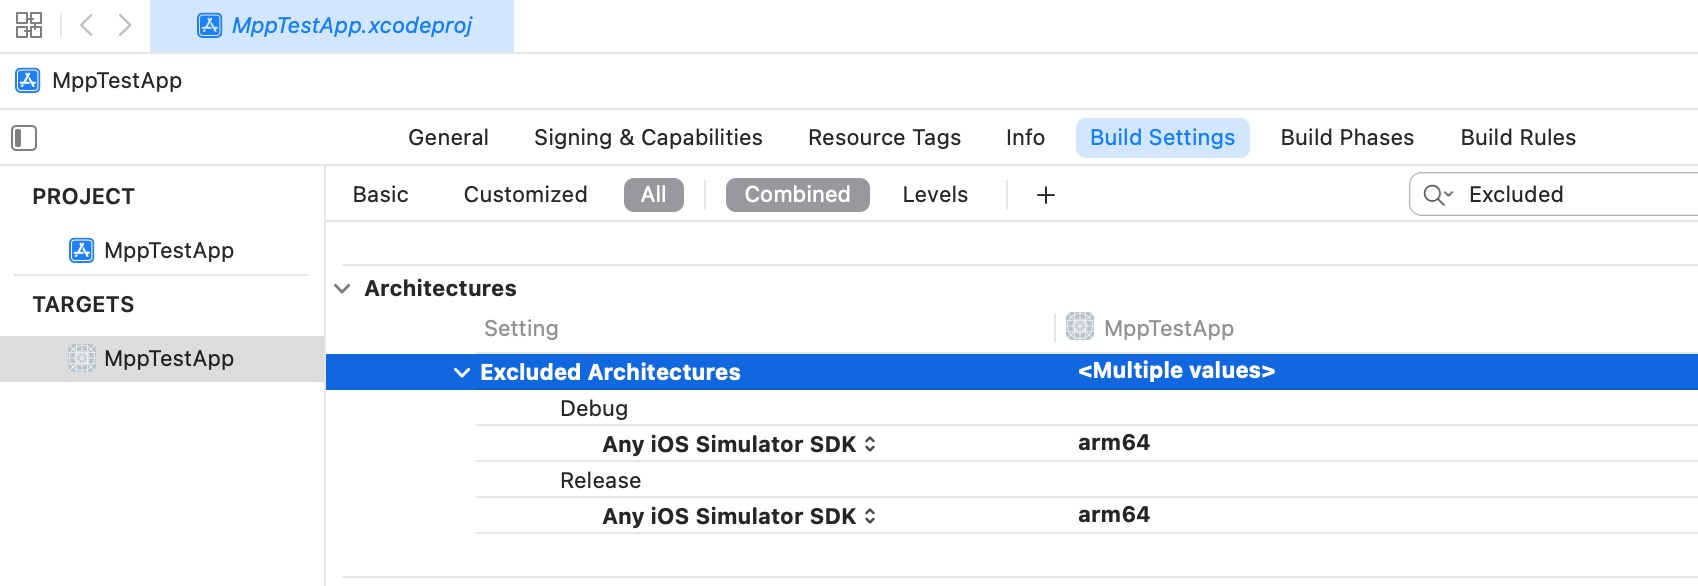
Enabling App for Apple Pay In-App Provisioning
Requesting Apple Pay In-App Provisioning Entitlement
Issuers must request the Apple Pay In-App Provisioning entitlement to fully develop and test the push provisioning flow.
According to Apple's documentation:
Only production Team IDs and Adam IDs can receive this entitlement and be whitelisted. To request it, send the following details via email to [email protected]:
Issuer NameandCountry CodeApp NameTeam ID(e.g., 1ABCD2FGHI)Adam ID(e.g., 123456789)
Your Team ID is available on the Apple Developer Account Membership page.
Your Adam ID (App Apple ID) is found on your App Store Connect App Information page.
Entitlement Configuration
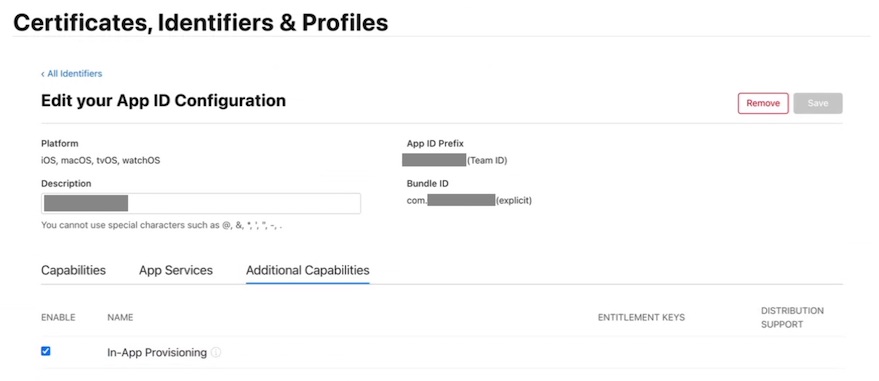
In Apple Developer - Certificates, Identifiers & Profiles, confirm that the Additional Capabilities section has "In-App Provisioning" enabled for your App ID:
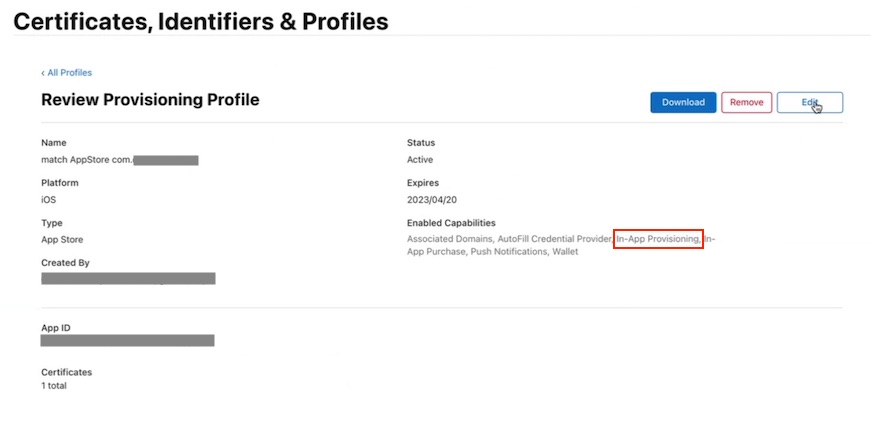
After Apple grants the entitlement, confirm it appears under Enabled Capabilities for your provisioning profile in Apple Developer - Profiles. Download and use this provisioning profile to build and sign your app in Xcode:
In Xcode, manually add the In-App Provisioning entitlement to your entitlements property list file. If the file doesn't exist, create <app/target_name>.entitlements and include it in your app resources:
<?xml version="1.0" encoding="UTF-8"?>
<!DOCTYPE plist PUBLIC "-//Apple//DTD PLIST 1.0//EN" "http://www.apple.com/DTDs/PropertyList-1.0.dtd">
<plist version="1.0">
<dict>
  <key>com.apple.developer.payment-pass-provisioning</key>
  <true/>
  <key>com.apple.developer.pass-type-identifiers</key>
  <array>
    <string>$(TeamIdentifierPrefix)*</string>
  </array>
</dict>
</plist>
Alternatively, use:
<?xml version="1.0" encoding="UTF-8"?>
<!DOCTYPE plist PUBLIC "-//Apple//DTD PLIST 1.0//EN" "http://www.apple.com/DTDs/PropertyList-1.0.dtd">
<plist version="1.0">
<dict>
  <key>com.apple.developer.payment-pass-provisioning</key>
  <true/>
  <key>com.apple.developer.pass-type-identifiers</key>
  <array/>
</dict>
</plist>
PNO Pass Metadata Configuration
The PassKit framework requires the card profiles from payment token services (MDES, VTS) to include the correct Associated Application Identifier (App ID) in associatedApplicationIdentifiers.
The App ID is constructed by combining your Team ID with the app's Bundle ID (e.g., 1ABCD2FGHI.com.bank.app).
Ensure these key-value pairs are set correctly:
contactNamebank_appassociatedApplicationIdentifiersassociatedStoreIdentifiersappLaunchURL
References
Updated 5 months ago